
Getting OGU roadworthy again
![]() Post by: billwill » Sun Nov 04, 2012 1:15 am
Post by: billwill » Sun Nov 04, 2012 1:15 am
The efforts to seal tiny leak in the temperature gauge system (at the capillary pipe junction into the bulb) with epoxy resin was unsuccessful. The gauge works when putting the bulb in very hot water, but bubbles of ether were coming out, so I rapidly transferred it to cold water to avoid wasting ether. Perhaps Ether dissolves resin.
After scraping off the resin, I tried again with the bottom of the bulb in cold water and a hot electric soldering iron to remelt and add more solder to the joint. This was a bit more successful as there were less bubbles, so this technique might work if I can use a hotter soldering iron.
After scraping off the resin, I tried again with the bottom of the bulb in cold water and a hot electric soldering iron to remelt and add more solder to the joint. This was a bit more successful as there were less bubbles, so this technique might work if I can use a hotter soldering iron.
Bill Williams
36/6725 S3 Coupe OGU108E Yellow over Black.
36/6725 S3 Coupe OGU108E Yellow over Black.
- billwill
- Coveted Fifth Gear

- Posts: 5062
- Joined: 19 Apr 2008
![]() Post by: StressCraxx » Sun Nov 04, 2012 2:11 am
Post by: StressCraxx » Sun Nov 04, 2012 2:11 am
Ether is an aggressive solvent on some epoxies. When you mix the epoxy, air bubbles can be entrained and make the epoxy porous. The high watt soldering iron is your best bet.
There is no cure for Lotus, only treatment.
-

StressCraxx - Coveted Fifth Gear
- Posts: 1425
- Joined: 26 Sep 2003

![]() Post by: billwill » Sun Nov 04, 2012 9:09 pm
Post by: billwill » Sun Nov 04, 2012 9:09 pm
Well the exhaust pipes are now on and I'm exhausted 
I decided to do it by lifting off the cylinder head again, mostly because my garage is somewhat cramped and I have to push the rear of the car out of the garage door to get room to work at the front, So if I jacked up the engine and removed the left hand mount, It just might have been tricky to line up the holes again so if needed to call a friend to help and if he couldn't come until the next day, I would be unable to lock up the garage.
The silicone sealer seemed to have protected the cork gasket on the top of the timing case, so the head lifted off without damaging it, so I did not need to delay to have a new gasket sent.
Bill Williams
36/6725 S3 Coupe OGU108E Yellow over Black.
36/6725 S3 Coupe OGU108E Yellow over Black.
- billwill
- Coveted Fifth Gear
- Posts: 5062
- Joined: 19 Apr 2008
![]() Post by: Quart Meg Miles » Sun Nov 04, 2012 10:08 pm
Post by: Quart Meg Miles » Sun Nov 04, 2012 10:08 pm
I've refilled the temperature gauge a few times and found that when the pipe is open there is a reading of 37? on the dial, the boiling point of ether, and the gauge will not read below that if you seal with an iced bulb. You need a third water container at 37? to put the bulb in to warm up before you seal it and then the gauge will read correctly. It isn't always successful first time. You can split the pipe and join the ends in a brass tube with a sealing hole in its middle to simplify the filling and soldering.
Thanks for source of ether, I'd always got mine from tame pathologists but they've retired.
Thanks for source of ether, I'd always got mine from tame pathologists but they've retired.
Meg
26/4088 1965 S1½ Old and scruffy but in perfect working order; the car too.
________________Put your money where your mouse is, click on "Support LotusElan.net" below.
26/4088 1965 S1½ Old and scruffy but in perfect working order; the car too.
________________Put your money where your mouse is, click on "Support LotusElan.net" below.
-

Quart Meg Miles - Coveted Fifth Gear
- Posts: 1278
- Joined: 03 Oct 2012

![]() Post by: billwill » Mon Nov 05, 2012 2:33 am
Post by: billwill » Mon Nov 05, 2012 2:33 am
Quart Meg Miles wrote:I've refilled the temperature gauge a few times and found that when the pipe is open there is a reading of 37? on the dial, the boiling point of ether, and the gauge will not read below that if you seal with an iced bulb. You need a third water container at 37? to put the bulb in to warm up before you seal it and then the gauge will read correctly. It isn't always successful first time. You can split the pipe and join the ends in a brass tube with a sealing hole in its middle to simplify the filling and soldering.
Thanks for source of ether, I'd always got mine from tame pathologists but they've retired.
I think that means that you have to drive the air out with Ether vapour so that there is only ether and ether vapour in the system. I was wondering about the effect of air in the system & whether or not the oxygen in that air could flash burn with the ether; but I've not yet looked up the flash point of Ether in air.
Interestingly your comments imply that when the temperature is below 37 degrees, the pressure in the capillary system is below atmospheric.
It might be interesting to make a junction such as you describe, but from a small brass block, then the filling hole could be threaded and the final sealing done with a pointed grub-screw, so there was no soldering involved in the final stage.
Bill Williams
36/6725 S3 Coupe OGU108E Yellow over Black.
36/6725 S3 Coupe OGU108E Yellow over Black.
- billwill
- Coveted Fifth Gear
- Posts: 5062
- Joined: 19 Apr 2008
![]() Post by: oldelanman » Mon Nov 05, 2012 7:50 am
Post by: oldelanman » Mon Nov 05, 2012 7:50 am
billwill wrote:I notice that one of the 4 bolts into the block on the left side is missing, don't know when that happened, and its spacer is gone too of course. What size & spec bolts are these?
billwill wrote:I'll need to make a new spacer, but I think I have some suitable steel pipe I can cut a length off.
Bill, Did you manage to sort this issue ? Just spotted these on ebay.........http://www.ebay.co.uk/itm/LOTUS-ELAN-TW ... 2324ce5837
Roger
S4 DHC
S4 DHC
- oldelanman
- Coveted Fifth Gear
- Posts: 1969
- Joined: 02 Jan 2008
![]() Post by: garyeanderson » Mon Nov 05, 2012 10:28 am
Post by: garyeanderson » Mon Nov 05, 2012 10:28 am
oldelanman wrote:billwill wrote:I notice that one of the 4 bolts into the block on the left side is missing, don't know when that happened, and its spacer is gone too of course. What size & spec bolts are these?billwill wrote:I'll need to make a new spacer, but I think I have some suitable steel pipe I can cut a length off.
Bill, Did you manage to sort this issue ? Just spotted these on ebay.........http://www.ebay.co.uk/itm/LOTUS-ELAN-TW ... 2324ce5837
Engine mount bolt length question was asked and answered in August of this year.
elan-f15/block-engine-mount-bolts-t25895.html
The exhaust side spacers on the early bolocks are 1.125 inch in length .75 O.D. and 5/16+ a bit I.D.
-

garyeanderson - Coveted Fifth Gear
- Posts: 3391
- Joined: 12 Sep 2003

![]() Post by: Quart Meg Miles » Mon Nov 05, 2012 12:17 pm
Post by: Quart Meg Miles » Mon Nov 05, 2012 12:17 pm
Temperature gauge again! You are right, Bill, the boiling point of ether is 34.6?C (not 37? as I stated) at which point the vapour pressure equals atmospheric pressure (not sure which value is Standard) so any temperature below that sucks the gauge back. Flash point is 160?C and mixed with air it is explosive at concentrations between 2 & 48% (volume or weight?) so keep your heat and head down.
If you do cut the pipe, and I can't see how to fill the system using the bulb alone, I would do it near the bulkhead for appearances sake. It's messy as you have to cut and wind back the steel overwind to expose the pipe.
The important thing is to get the air out by swamping and ejecting it with ether vapour so your grub screw method would allow you to seal at a higher temperature than BP; when soldering that's difficult because the vapour bubbles the solder causing a "dry joint" and if you seal at ice temperature you will suck air back in and get wrong readings. Lacquer your screw afterwards for a perfect seal.
Good luck!
Meg
26/4088 1965 S1½ Old and scruffy but in perfect working order; the car too.
________________Put your money where your mouse is, click on "Support LotusElan.net" below.
26/4088 1965 S1½ Old and scruffy but in perfect working order; the car too.
________________Put your money where your mouse is, click on "Support LotusElan.net" below.
-
Quart Meg Miles - Coveted Fifth Gear
- Posts: 1278
- Joined: 03 Oct 2012
![]() Post by: billwill » Tue Nov 06, 2012 11:55 pm
Post by: billwill » Tue Nov 06, 2012 11:55 pm
I had to join the exhaust manifolds to the Y-piece today. This is how I do it.
Getting the Y-piece onto the manifolds, can be a tricky job, under the car. I use a technique that some might want to try.
I tie a rope tightly to the long pipe, rear side of the u-clamp holding the y-piece to the long pipe., with several feet of rope either side of the knot.
I tie the free ends together after looping it over the front cross-member, so that I then have a double rope tie between the rear-exhaust system and the front chassis.
I put a tommy bar, from a socket spanner set, in between the two ropes & twist them like a tourniquet. This pulls the exhaust towards the manifold AND holds it, while I engage the pipes together. After partial engagement I twist more to pull the manifolds into the slit Y-piece, while tapping the branches of the -Y-piece with a hammer. I test that the pipes are fully engaged by trying to poke a wire into the pipe sideways at the bottom end of the slits in the Y-Piece. No gasket/exhaust goo is needed.
I then tighten U-clamps fitting them sideways with the threads horizontal, so that they won't hit the road on any bumps.
It would be very difficult to do any other way as there is no suitable place that you can hit with a mallet to knock the pipes into each other.
Last edited by billwill on Sat Nov 10, 2012 3:15 am, edited 1 time in total.
Bill Williams
36/6725 S3 Coupe OGU108E Yellow over Black.
36/6725 S3 Coupe OGU108E Yellow over Black.
- billwill
- Coveted Fifth Gear
- Posts: 5062
- Joined: 19 Apr 2008
![]() Post by: billwill » Wed Nov 07, 2012 12:02 am
Post by: billwill » Wed Nov 07, 2012 12:02 am
And for my next trick. What is the best way to get a stubborn oil filter off?
My socket-set headed strap wrench is not shifting it, but is buckling the tin container of the filter.
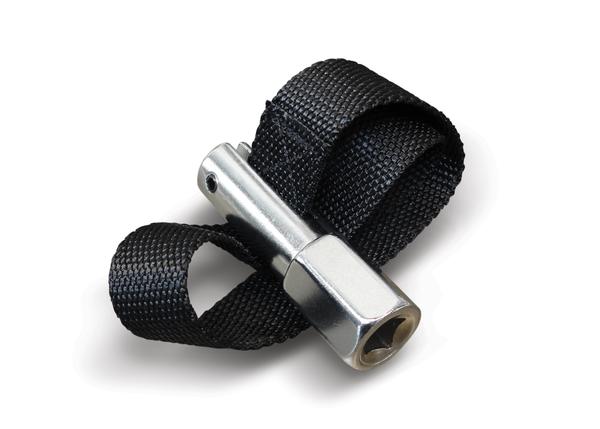
Photo borrowed from http://www.motionpro.com/motorcycle/partno/08-0069
My socket-set headed strap wrench is not shifting it, but is buckling the tin container of the filter.
Photo borrowed from http://www.motionpro.com/motorcycle/partno/08-0069
Last edited by billwill on Wed Nov 07, 2012 12:44 am, edited 1 time in total.
Bill Williams
36/6725 S3 Coupe OGU108E Yellow over Black.
36/6725 S3 Coupe OGU108E Yellow over Black.
- billwill
- Coveted Fifth Gear
- Posts: 5062
- Joined: 19 Apr 2008
![]() Post by: ardee_selby » Wed Nov 07, 2012 12:14 am
Post by: ardee_selby » Wed Nov 07, 2012 12:14 am
billwill wrote:My socket-set headed strap wrench is not shifting it, but is bucking the tin container of the filter
Are you gripping low down on the canister? If so, try shifting the strap as high as you can get it, so it is gripping the base of the filter where it's more crush resistant.
If no joy...I've resorted to the screwdriver through canister trick. Messy but hey...
Don't use the strap to tighten the new one though as I did in my youth!
Good luck - Richard
Last edited by ardee_selby on Wed Nov 07, 2012 8:55 am, edited 1 time in total.
- ardee_selby
- Coveted Fifth Gear
- Posts: 2197
- Joined: 30 Sep 2003

![]() Post by: Quart Meg Miles » Wed Nov 07, 2012 6:37 pm
Post by: Quart Meg Miles » Wed Nov 07, 2012 6:37 pm
Bill, you wrote:
I put a tommy bar, from a socket spanner set, in between the two ropes & twist them like a tourniquet.
It's called a Spanish windlass!
I put a tommy bar, from a socket spanner set, in between the two ropes & twist them like a tourniquet.
It's called a Spanish windlass!
Meg
26/4088 1965 S1½ Old and scruffy but in perfect working order; the car too.
________________Put your money where your mouse is, click on "Support LotusElan.net" below.
26/4088 1965 S1½ Old and scruffy but in perfect working order; the car too.
________________Put your money where your mouse is, click on "Support LotusElan.net" below.
-
Quart Meg Miles - Coveted Fifth Gear
- Posts: 1278
- Joined: 03 Oct 2012
![]() Post by: billwill » Fri Nov 09, 2012 12:44 am
Post by: billwill » Fri Nov 09, 2012 12:44 am
Richards suggestion of as high on the can as possible, plus unreasonable torque, did undo the oil filter without piercing the canister.
On the temperature gauge I decided to have one more go at soldering it. I don't have a hotter iron than the 60 watt one, so a fair distance from the bulb, I heated the tip of my electric soldering iron with a blowlamp. This amount of heat seems to have sealed it this time. I did not try warming the bulb as you mentioned above, Meg, because the gauge dial does not go down to ambient temperature anyway, so a lower than atmospheric pressure in the capillary tube might actually cause the needle to bend backwards against the low stop.
Oh well, however when put in boiling water it only gets as high as 190 deg F, which I suspect means that there is not enough ether in there. Anyway It will do for now, I'll improve it later. I had to fit the instrument back in the car because I do not want to try starting the engine with a new cylinder head without an OIL PRESSURE gauge, and of course the are both in the same dial.
Today would have been the day when I first tried starting the engine, but alas I could not find the eight nyloc nuts and copper washers to hold the cam cover on. I thought they were lost, so I went to 3 places selling nuts & bolts,
One little gem though, was that I found a really nice aluminium non-return valve in the motor factors for a few quid. I think it is intended for a fuel line, but it will do right well as an extra NRV in my vacuum line for the headlight lifters. Yesterday I had also washed my T-piece with built-in NRV in soapy water overnight and that is working quite well too so with the two I hopefully will get a really good vacuum system.
Anyway after supper, I went back down to the garage & had a good hunt around and found my missing Nyloc nuts & copper washers all done up in an old rubber glove. So the cam cover is now on and the oil & coolant are in, but alas I could not be anti-social and try to start up the engine at 23:00 in the evening. My neighbours go to bed before then.
I plan to rotate the engine on the starter motor with no spark plugs in place (which is a quite noisy operation) to get the oil circulating and fill the oil filter before I try to fire it up on fuel. Methinks I should have filled the oil filter canister before I screwed it on, but I forgot.
On the temperature gauge I decided to have one more go at soldering it. I don't have a hotter iron than the 60 watt one, so a fair distance from the bulb, I heated the tip of my electric soldering iron with a blowlamp. This amount of heat seems to have sealed it this time. I did not try warming the bulb as you mentioned above, Meg, because the gauge dial does not go down to ambient temperature anyway, so a lower than atmospheric pressure in the capillary tube might actually cause the needle to bend backwards against the low stop.
Oh well, however when put in boiling water it only gets as high as 190 deg F, which I suspect means that there is not enough ether in there. Anyway It will do for now, I'll improve it later. I had to fit the instrument back in the car because I do not want to try starting the engine with a new cylinder head without an OIL PRESSURE gauge, and of course the are both in the same dial.
Today would have been the day when I first tried starting the engine, but alas I could not find the eight nyloc nuts and copper washers to hold the cam cover on. I thought they were lost, so I went to 3 places selling nuts & bolts,
- A Motor factors advertising "Any part for any car" but they only had metric nuts
Halfords ... metric only
B&Q .. metric only..
One little gem though, was that I found a really nice aluminium non-return valve in the motor factors for a few quid. I think it is intended for a fuel line, but it will do right well as an extra NRV in my vacuum line for the headlight lifters. Yesterday I had also washed my T-piece with built-in NRV in soapy water overnight and that is working quite well too so with the two I hopefully will get a really good vacuum system.
Anyway after supper, I went back down to the garage & had a good hunt around and found my missing Nyloc nuts & copper washers all done up in an old rubber glove. So the cam cover is now on and the oil & coolant are in, but alas I could not be anti-social and try to start up the engine at 23:00 in the evening. My neighbours go to bed before then.
I plan to rotate the engine on the starter motor with no spark plugs in place (which is a quite noisy operation) to get the oil circulating and fill the oil filter before I try to fire it up on fuel. Methinks I should have filled the oil filter canister before I screwed it on, but I forgot.
Last edited by billwill on Fri Nov 09, 2012 8:23 pm, edited 1 time in total.
Bill Williams
36/6725 S3 Coupe OGU108E Yellow over Black.
36/6725 S3 Coupe OGU108E Yellow over Black.
- billwill
- Coveted Fifth Gear
- Posts: 5062
- Joined: 19 Apr 2008
![]() Post by: billwill » Fri Nov 09, 2012 8:20 pm
Post by: billwill » Fri Nov 09, 2012 8:20 pm
She Runs!
My Elan's engine with its brand new SAS cylinder head started for the first time today.
At first I had a problem with fuel leaking at the entry to the front carb, but I found (eventually) that an O-ring fixed that.
Then I was worried by clouds of white smoke (steam) from the tailpipe so I thought "Oh No, not again", but eventually it cleared so I'm pretty sure that it was just condensed water in the exhaust system.
It's running pretty rough, not surprising as I've not tuned the idle mixtures or carb balance yet, but I've got a fine 30-40 psi oil pressure and the mended temp gauge is reading something at least which I reckon is its attempt to show about 85-90 deg C.
My headlights come up.. (without the new NRV yet) but they don't light up..and my green "fan-on" indicator light isn't working, so there's a few connector problems there on the left front side, but I'll sort that out soon.
And even my new HEL flexible brake-lines arrived today, presumably in their correct Imperial fittings (I haven't checked yet).
So all is going swimmingly..
I'll put the new HEL brake lines on before an MOT, but I'll probably wait a while now before I do the copper brake-lines.
Bill Williams
36/6725 S3 Coupe OGU108E Yellow over Black.
36/6725 S3 Coupe OGU108E Yellow over Black.
- billwill
- Coveted Fifth Gear
- Posts: 5062
- Joined: 19 Apr 2008
Total Online:
Users browsing this forum: No registered users and 21 guests