
Head removal & replacement for dummies. What to avoid.
58 posts
• Page 1 of 4 • 1, 2, 3, 4
![]() Post by: Johnfm » Fri Nov 22, 2013 11:16 am
Post by: Johnfm » Fri Nov 22, 2013 11:16 am
I have the manual.
I have searched on here.
I want to avoid the obvious errors.
So this is my plan - please feel free to pick holes and chip in with "whatever you do, make sure you..."
I will avoid some obvious ones like 'disconnect battery etc. Also, I don't have the manual in front of me - so I am probably missing a few steps.
Lastly, I am doing this mainly to eliminate the oil leaks I have at the front of the engine. I don't intend to do any 'while you are in there' type things - water pump isn't leaking, I don't want to put in a hotter cam or bigger valves etc - I just want the lowest cost oil leak elimination strategy and need to reset the valve clearances on rebuild as three of them are below spec.
Here goes:
Drain cooling system
Remove carbs and exhaust headers, plugs
remove cam cover
Take lots of reference pictures
Mark cam sprockets and corresponding point on cam chain (engrave sprocket wheel? Tippex on cam chain?)
re-measure valve clearance in case I got them wrong the other time!
use cable tie and string etc to suspend timing chain so it doesn't drop off the crank sprocket
loosen off cam chain tensioner
mark/number camshaft bearing cap things if not already numbered
remove camshaft retaining bolts and remove camshafts.
remove headbolts (in order described in manual)
remove head
***Just how stubborn will the head be? I have no doubt it won't want to move! Any tips for removal without damaging the mating surfaces?***
drink beer
suffer pangs of doubt and regret - why did I do this!!
deliver head to engine machine shop for crack test/skim, valve seat lapping etc etc
sit down while getting bad news from machine shop
pay bill
refit questions:
Do I need to replace all the head bolts/washers? Is there anything that is a must replace (not necessarily a 'while you are in there you may as well...I don't need to touch the water pumpe etc as it isn't leaking)
What are the really big risks of doign this removal myself? For refit I will be using a 30 year qualified mechanic tohelp (ie do most of it whiel I watch and learn)
Lastly, though I have doen a search - feel free to say "go read the archives..."
1967 Plus 2 #0168
- Johnfm
- Third Gear

- Posts: 335
- Joined: 20 Jan 2013
![]() Post by: john.p.clegg » Fri Nov 22, 2013 12:06 pm
Post by: john.p.clegg » Fri Nov 22, 2013 12:06 pm
John
When you're tightening the cam caps down,if they are getting tight , BACK OFF, the camshaft may not be seated correctly CHECK or you will snap the camshaft...
John
When you're tightening the cam caps down,if they are getting tight , BACK OFF, the camshaft may not be seated correctly CHECK or you will snap the camshaft...
John
-

john.p.clegg - Coveted Fifth Gear

- Posts: 5745
- Joined: 21 Sep 2003

![]() Post by: jono » Fri Nov 22, 2013 12:15 pm
Post by: jono » Fri Nov 22, 2013 12:15 pm
John,
In addition to what you have said. This all worked for me:
Make sure the engine is at TDC on Nr 1 with the cam lobes facing toward each other on nr4. The cam sprockets timing marks should now be facing each other at this position, roughly level with the top of the head. If there are no marks, make some with tippex.
I would leave the cams fitted in place but make sure you don't turn the engine once the chain is removed. You can let the chain drop to rest on the water pump chamber. You will need to remove the sprockets.
Crack the head bolts working out from the centre and make sure you remember the 3 small bolts to the timing case end. You will need to remove the rear inlet cam cap to get the head bolt off as there is insufficient space to get a socket on.
The head should now come away - with a bit of luck you might be able to pull the exhaust manifold away and leave it connected to the exhaust.
First time I've done it was a few weeks ago and it really is quite straight forward. Putting back is also not difficult though I had trouble getting the timing mark back in line but did it eventually (lack of experience, there's a knack which I think I've got now).
Jon
- jono
- Coveted Fifth Gear
- Posts: 2027
- Joined: 17 May 2007
![]() Post by: rgh0 » Fri Nov 22, 2013 12:31 pm
Post by: rgh0 » Fri Nov 22, 2013 12:31 pm
what you say is good.
A few comments
1. If the head is not leaking now there is no real need to send it for a crack check or skim. I would check its flatness with a straight edge and feeler gauges but no real need to send to shop unless you have a problem.
2. I hook the chain with a length of wire and don't worry about it dropping off the crank sprocket I just pull it up again with the wire when time comes to refit the sprockets.
3. Measure the head thickness when you have it off so you understand how much it has been skimmed already.
4. when removing and refitting the cams be very careful not to move crank as its very easy to bend the valve stems if the pistons hit the valves.
otherwise just follow the manual steps and you will be fine
-

rgh0 - Coveted Fifth Gear
- Posts: 8831
- Joined: 22 Sep 2003

![]() Post by: oldelanman » Fri Nov 22, 2013 12:42 pm
Post by: oldelanman » Fri Nov 22, 2013 12:42 pm
Johnfm wrote:I am doing this mainly to eliminate the oil leaks I have at the front of the engine.
In that case I would find out exactly where the oil is leaking from before you start. If it's from the joint between the two halves of the front cover or the two halves are misaligned then just removing/refitting the head may not cure it.
Roger
S4 DHC
S4 DHC
- oldelanman
- Coveted Fifth Gear
- Posts: 1969
- Joined: 02 Jan 2008
![]() Post by: Fred Talmadge » Fri Nov 22, 2013 2:27 pm
Post by: Fred Talmadge » Fri Nov 22, 2013 2:27 pm
Don't forget that rubber fitting in the back that goes from the head to the block.
-

Fred Talmadge - Fourth Gear

- Posts: 667
- Joined: 24 Sep 2003

![]() Post by: Johnfm » Fri Nov 22, 2013 2:39 pm
Post by: Johnfm » Fri Nov 22, 2013 2:39 pm
Thanks all - all good points.
Jono - I thnk I have to remove the camshaft as I need to correct the lack of clearance I hace at #1 inlet, #1 outlets and #3 inlet - all these have not enough clearance.
Rohan
Good idea re: checking with a straight edge etc. Head may not be remotely warped or cracked. No signs at all of water in oil, no smoke or anything in exhaust - in fact, it is the least smoky car I have ever owned!
Re: the HG may not cure teh leak - I agree.
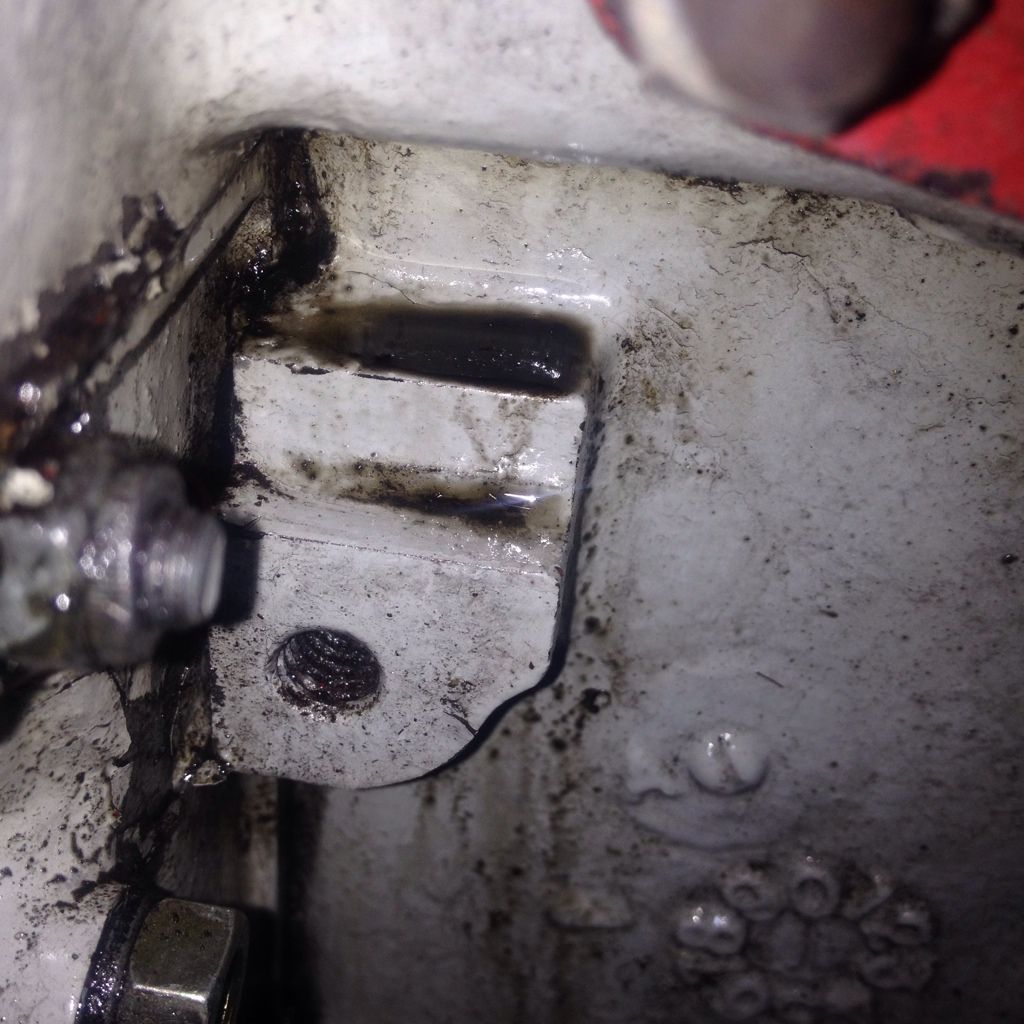
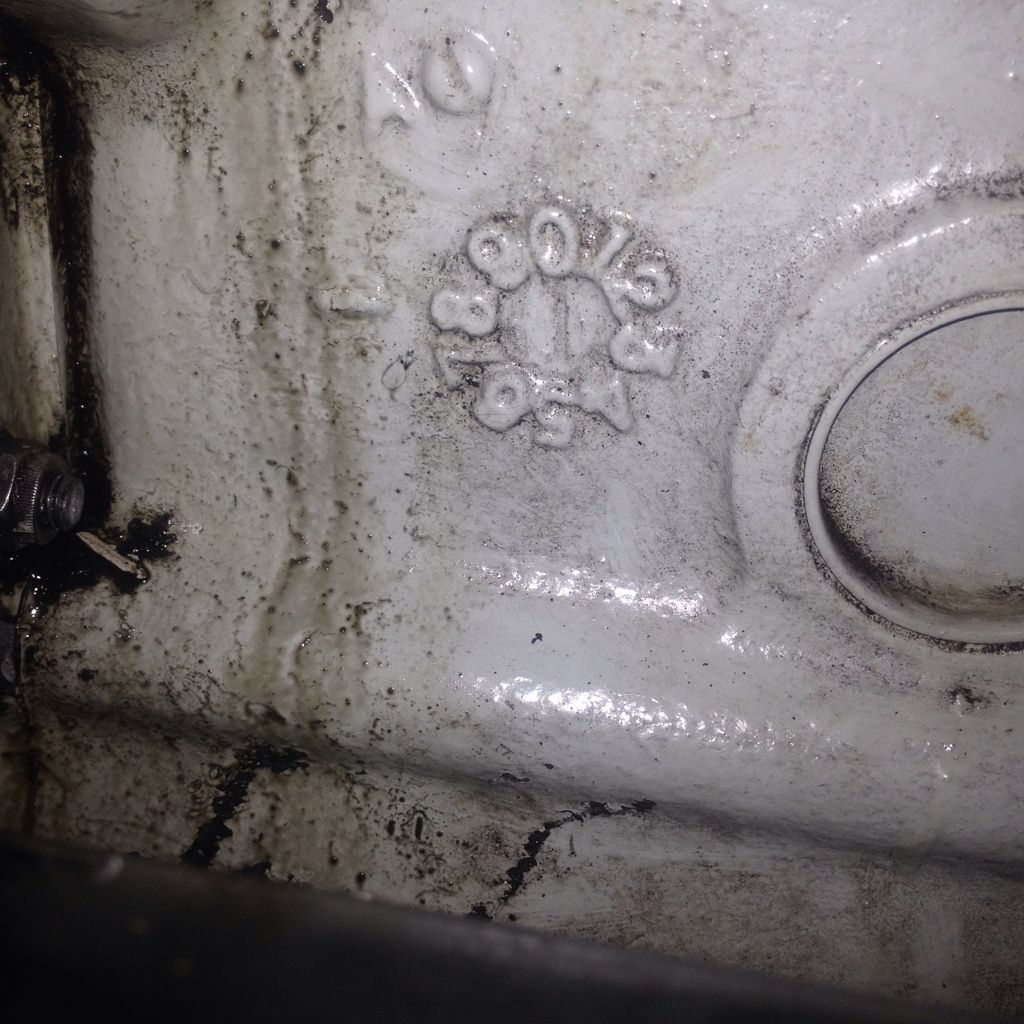
It isn't all that easy to pinpoint exactly where the oil is leaking from.
What I might do is a 'temporary' bodge with some of the black gasket silcone stuff I have.
If I liberally apply it to where I think it is leaking and then run the car for a couple of miles and the leak is stopped or reduces, I will knwo where it is coming from.
Currently this are is very wet:
Jono - I thnk I have to remove the camshaft as I need to correct the lack of clearance I hace at #1 inlet, #1 outlets and #3 inlet - all these have not enough clearance.
Rohan
Good idea re: checking with a straight edge etc. Head may not be remotely warped or cracked. No signs at all of water in oil, no smoke or anything in exhaust - in fact, it is the least smoky car I have ever owned!
Re: the HG may not cure teh leak - I agree.
It isn't all that easy to pinpoint exactly where the oil is leaking from.
What I might do is a 'temporary' bodge with some of the black gasket silcone stuff I have.
If I liberally apply it to where I think it is leaking and then run the car for a couple of miles and the leak is stopped or reduces, I will knwo where it is coming from.
Currently this are is very wet:
1967 Plus 2 #0168
- Johnfm
- Third Gear
- Posts: 335
- Joined: 20 Jan 2013
![]() Post by: andyhodg » Fri Nov 22, 2013 3:23 pm
Post by: andyhodg » Fri Nov 22, 2013 3:23 pm
Hi John
Only one thing to add. When I remove the camshafts I use some cable ties secure the cam chain to the sprockets to ensure that the chain does not move. I then use bungees from either the top edge of the bonnet or the garage ceiling to maintain tension on the cam chain ensuring it doesn't slip on the bottom sprocket.
Good luck
Andy
-

andyhodg - Third Gear
- Posts: 350
- Joined: 11 Oct 2005

![]() Post by: billwill » Fri Nov 22, 2013 3:47 pm
Post by: billwill » Fri Nov 22, 2013 3:47 pm
andyhodg wrote:Hi John
Only one thing to add. When I remove the camshafts I use some cable ties secure the cam chain to the sprockets to ensure that the chain does not move. I then use bungees from either the top edge of the bonnet or the garage ceiling to maintain tension on the cam chain ensuring it doesn't slip on the bottom sprocket.
Good luck
Andy
That honestly is not necessary. I can see that it might be useful if you are just doing the valve shims, but not so usefull if you are going to take the head off.
We detailed the procedure for getting the sprocket wheels back on and lined up only a few weeks ago. You can't actually kep the chain under tension from high above while you take the head off, because then your bungee or whatever will be surrounded by the front of the head (the chaincase part).
You need to know the full reinstall procedure anyway, because with just one tiny slip on the tension, the bottom of the chain will drop off the crankshaft and when you pull it back you cannot be sure that it has not moved by one tooth.
Bill Williams
36/6725 S3 Coupe OGU108E Yellow over Black.
36/6725 S3 Coupe OGU108E Yellow over Black.
- billwill
- Coveted Fifth Gear
- Posts: 5062
- Joined: 19 Apr 2008
![]() Post by: elanman999 » Fri Nov 22, 2013 4:34 pm
Post by: elanman999 » Fri Nov 22, 2013 4:34 pm
John,
While marking the cams, take the dizzy cap off and mark where the rotor arm is. This is just in case you drop the chain off the bottom sprocket and loose the chain position.
Also check the condition of the rubber head to block breather tube, replace if it's cracked.
Best of luck,
John
While marking the cams, take the dizzy cap off and mark where the rotor arm is. This is just in case you drop the chain off the bottom sprocket and loose the chain position.
Also check the condition of the rubber head to block breather tube, replace if it's cracked.
Best of luck,
John
- elanman999
- Third Gear
- Posts: 487
- Joined: 12 Nov 2005
![]() Post by: billwill » Fri Nov 22, 2013 5:03 pm
Post by: billwill » Fri Nov 22, 2013 5:03 pm
In message 1 you missed out
Remove exhaust manifold nuts and pull exhaust manifold off the head.
If it is the old cast iron manifold you will need to undo the clamp to the first expansion box.
If they are Y branch manifolds you will need to get underneath & undo the two front clamps on the Y joint.
Remove exhaust manifold nuts and pull exhaust manifold off the head.
If it is the old cast iron manifold you will need to undo the clamp to the first expansion box.
If they are Y branch manifolds you will need to get underneath & undo the two front clamps on the Y joint.
Bill Williams
36/6725 S3 Coupe OGU108E Yellow over Black.
36/6725 S3 Coupe OGU108E Yellow over Black.
- billwill
- Coveted Fifth Gear
- Posts: 5062
- Joined: 19 Apr 2008
![]() Post by: billwill » Fri Nov 22, 2013 9:41 pm
Post by: billwill » Fri Nov 22, 2013 9:41 pm
I've not tried, but I doubt that typex will stick to oily chains and sprocket wheels, so make lots of digital camera pictures of positions.
You can use plastic cable ties to make a temporary exaggerated timing mark on the sprockets.
Remember that contrary to what you might think (as I did for years) the position of the sprocket wheels is ultimately fixed, not by the camshafts but by the timing chain. The chain from crankshaft to exhaust sprocket and on to the inlet sprocket is taut so the sprockets can only be moved by one whole tooth position at a time.
A conseqiuence of this is that the timing marks on the two sprockets are not necessarily exactly aligned, but must be the closest fit possible by changing positions relative to the chain, by one tooth (chainlink) position at a time.
~~~~~~~~
After doing anything with the timing chain you cannot be sure that the chain engaged the same teeth on the jackshaft, which will alter the ignition timing; the safe process is to take the distributor out and reinsert it.
The instructions for re-inserting the distributor after any timing chain work is here:
lotus-electrical-f38/ignition-timing-t29911-30.html#p199792
You can use plastic cable ties to make a temporary exaggerated timing mark on the sprockets.
Remember that contrary to what you might think (as I did for years) the position of the sprocket wheels is ultimately fixed, not by the camshafts but by the timing chain. The chain from crankshaft to exhaust sprocket and on to the inlet sprocket is taut so the sprockets can only be moved by one whole tooth position at a time.
A conseqiuence of this is that the timing marks on the two sprockets are not necessarily exactly aligned, but must be the closest fit possible by changing positions relative to the chain, by one tooth (chainlink) position at a time.
- When a head is skimmed the camshafts and hence the sprockets are now nearer (by the skim amount) to the chankshaft than they used to be, but the timing chain has not altered length so the exhaust sprocket will now be a little further anti-clockwise (viewd from the front) than it used to be. So the timing mark will now be slightly below the horizontal top edge of the front of the head. Consequently the inlet sprocket will be slightly above the hozizontal line.
This will also have slightly changed the valve timing and if it is excessive you will need to move the camshafts back a little relative to the sprocket wheel by using either offset dowels or by adjustable sprocket wheels.
~~~~~~~~
After doing anything with the timing chain you cannot be sure that the chain engaged the same teeth on the jackshaft, which will alter the ignition timing; the safe process is to take the distributor out and reinsert it.
The instructions for re-inserting the distributor after any timing chain work is here:
lotus-electrical-f38/ignition-timing-t29911-30.html#p199792
Bill Williams
36/6725 S3 Coupe OGU108E Yellow over Black.
36/6725 S3 Coupe OGU108E Yellow over Black.
- billwill
- Coveted Fifth Gear
- Posts: 5062
- Joined: 19 Apr 2008
![]() Post by: AHM » Fri Nov 22, 2013 10:16 pm
Post by: AHM » Fri Nov 22, 2013 10:16 pm
Measure the shim thicknesses so that you know how much valve work you can get away with.
On reassembly-
Check the head and cam caps for dings and burrs.
Do tappet shim measurements with the head on the bench (on a block at either end to protect the valves) then you don't have to do it leaning over your car.
At the same time check the free movement of the cams - lubricate with plain oil so that you can see. When you take the cams off again check the bearings for tight spots - Now you can remove the burrs that you missed and it is easy to clean the head because it is not bolted to your car.
Get a couple of long studs to keep the head gasket in place and guide the head on.
As mentioned earlier - but worth repeating!
Don't forget the rubber tube or the breather grommet.
Be careful of piston to valve contact - I have faith in the designers so didn't bother with plastigauge - But do be aware that it all gets very close. - Be very observant when rotating the engine after putting the timing chain on - you need to be on the right link.
Look-up where the cut washers should go - then you know they are in the right places.
Don't use any sealant on the cam cover gasket - you will have to take it off again in 500 miles.
- AHM
- Coveted Fifth Gear
- Posts: 1453
- Joined: 19 Apr 2004
58 posts
• Page 1 of 4 • 1, 2, 3, 4
Total Online:
Users browsing this forum: No registered users and 24 guests