Dashboard replacement
25 posts
• Page 1 of 2 • 1, 2
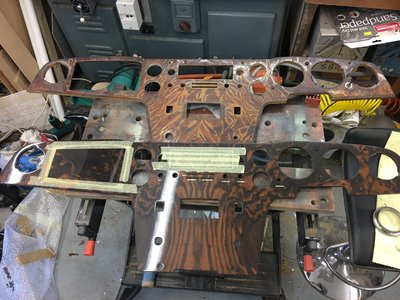
I?ve just about stripped everything out of my old dashboard, currently the bonnet release cable is putting up a fight but it?ll lose in the end! I notice that there are what look like steel sleeves in each of the securing bolt holes in the old dash, are these supposed to be bonded in or to be loose?
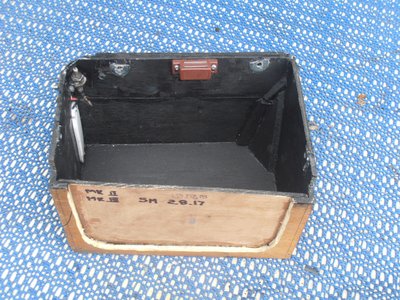
The rest looks fairly straightforward, just need to order some small brass screws as the slots in the originals are not too good by the time I?d got them out and the glove box is very tatty so I?ll try people such as Sue Miller to see what they have in the way of replacements.
The rest looks fairly straightforward, just need to order some small brass screws as the slots in the originals are not too good by the time I?d got them out and the glove box is very tatty so I?ll try people such as Sue Miller to see what they have in the way of replacements.
Change is inevitable, except from a vending machine!
- Bigbaldybloke
- Fourth Gear

- Posts: 894
- Joined: 16 May 2017
I dont think the inserts were bonded in, the ones I have seen were a tight push in fit.
They have ridges on them to prevent turning in the wood so I dont think glue would be necessary.
They have ridges on them to prevent turning in the wood so I dont think glue would be necessary.
Brian
64 S2 Roadster
72 Sprint FHC
64 S2 Roadster
72 Sprint FHC
-

types26/36 - Coveted Fifth Gear

- Posts: 3877
- Joined: 11 Sep 2003
Bigbaldybloke wrote: <snip> the glove box is very tatty so I?ll try people such as Sue Miller to see what they have in the way of replacements.
When I was fitting my replacement dash two years ago, I made up a 'drop down' glovebox to give access behind the dash. Paid for itself recently when the oil gauge pressure line had to be replaced. I also replaced the constantly jamming locking unit with a simple magnetic catch
68 Elan +2, 70 Elan +2s
-

Foxie - Coveted Fifth Gear

- Posts: 1632
- Joined: 20 Sep 2003
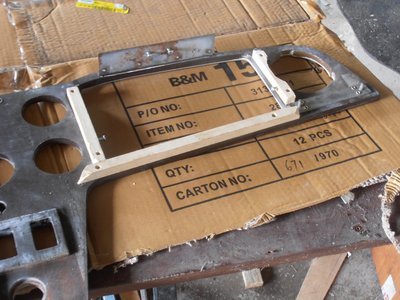
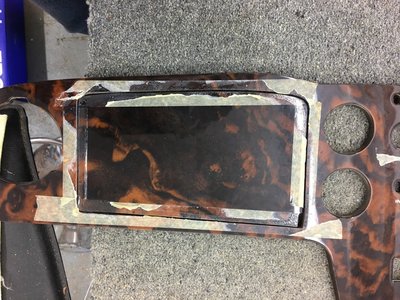
A bit of a problem, the glove box lid and radio blank had been taped in place using masking tape, after 20+ years behind the wardrobe, the tape has become brittle and the glue very sticky and on trying to peal the tape off it has left a residue of glue on the dashboard and some small bits of tape that are well stuck.
Suggestions wanted as to what to use to remove the glue without damaging the polish on the veneer.
Suggestions wanted as to what to use to remove the glue without damaging the polish on the veneer.
Change is inevitable, except from a vending machine!
- Bigbaldybloke
- Fourth Gear

- Posts: 894
- Joined: 16 May 2017
In reply to Jono, no I?m not fitting a new dashboard harness but will be modifying and rebinding the original to include for changing to an alternator and voltmeter instead of an ammeter, an electric oil pressure gauge, a solenoid to operate the vacuum for the headlights and a DAB radio, plus an electric windscreen washer pump, and a switch for the spotlights by the front air intake. Might include an override switch to force the radiator electric fans on too. Probably won?t include the anti theft switch in the glove box, but might put a better quality switch elsewhere.
Last edited by Bigbaldybloke on Fri Mar 23, 2018 11:38 pm, edited 1 time in total.
Change is inevitable, except from a vending machine!
- Bigbaldybloke
- Fourth Gear

- Posts: 894
- Joined: 16 May 2017
Bigbaldybloke wrote:A bit of a problem, the glove box lid and radio blank had been taped in place using masking tape, after 20+ years behind the wardrobe, the tape has become brittle and the glue very sticky and on trying to peal the tape off it has left a residue of glue on the dashboard and some small bits of tape that are well stuck.
Suggestions wanted as to what to use to remove the glue without damaging the polish on the veneer.
White spirit ! Don't use thinners !
68 Elan +2, 70 Elan +2s
-

Foxie - Coveted Fifth Gear

- Posts: 1632
- Joined: 20 Sep 2003
Foxie wrote:Bigbaldybloke wrote:A bit of a problem, the glove box lid and radio blank had been taped in place using masking tape, after 20+ years behind the wardrobe, the tape has become brittle and the glue very sticky and on trying to peal the tape off it has left a residue of glue on the dashboard and some small bits of tape that are well stuck.
Suggestions wanted as to what to use to remove the glue without damaging the polish on the veneer.
White spirit ! Don't use thinners !
Lighter fluid. If you ever go into an old vinyl record shop, you'll always find they have cans of it - it dissolves the glue on labels without damaging the covers, or leaving any residue.
-

draenog - Third Gear

- Posts: 291
- Joined: 26 Dec 2013
+1 for lighter fluid - used for donkeys years in design companies to de-sticky anything!
Robbie
Robbie
-

Robbie693 - Coveted Fifth Gear

- Posts: 1638
- Joined: 08 Oct 2003
The steel sleeves are a push fit & can be removed but I think you have to push them out from the back side. I removed mine when I re-veneered my dash then pressed them back in after finishing the dash.
Keith Marshall
69 S4 SE DHC RHD Original owner
69 S4 SE DHC RHD Original owner
- saildrive2001
- Fourth Gear

- Posts: 597
- Joined: 29 Oct 2003
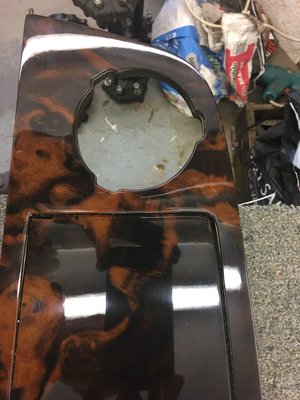
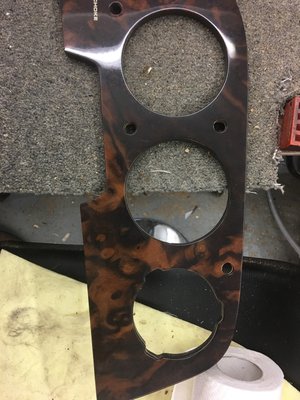
Thanks for all the advice, lighter fluid, paper towels and lots of elbow grease has got the dash looking great.
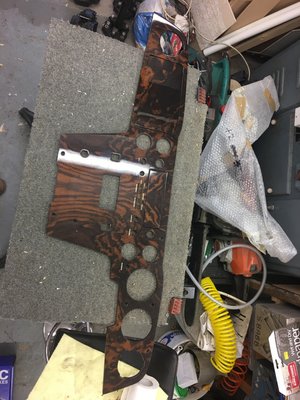
Next problem I noticed while doing this is that a couple of holes are missing in the new dash, the top left securing bolt hole and the hole for the bonnet release.
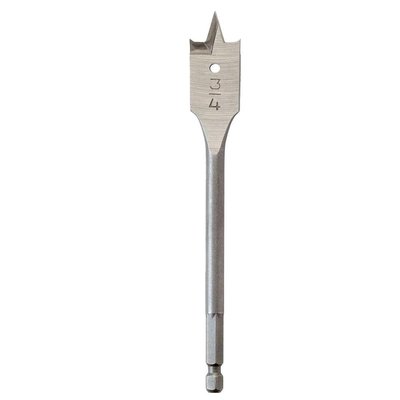
What?s the best type of drill for drilling the holes, a metal drill or one of the flat type wood drills or one of the very old type wooden drills that have the little screw in the centre and the normal spiral flutes? Plus drill from the back or front and any other suggestions. I?m tempted to clamp a block of wood to the front of where I need to drill with g-clamps and drill from the back using a new sharp flat type wood drill, anyone done this?
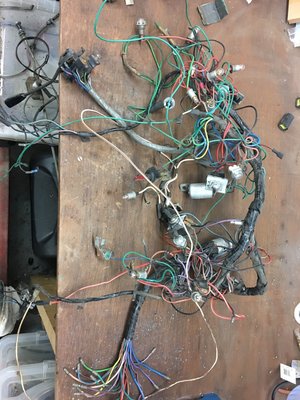
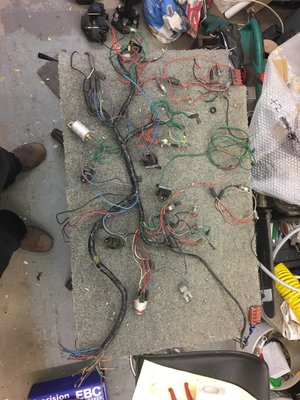
I?ve also laid out the dashboard wiring harness and the wires all look in good condition and are still flexible with no apparent cracks in the insulation. The connectors all look a bit discoloured, but are well crimped and secure. The bullet connectors all look to have light surface corrosion, but nothing that some sort of clean wouldn?t shift, has anyone tried this, what?s the best way of doing this?
- Attachments
Change is inevitable, except from a vending machine!
- Bigbaldybloke
- Fourth Gear

- Posts: 894
- Joined: 16 May 2017
I think that I would do exactly as you described, preferably using a Forstner bit
or the flat blade wood bit that has the center v and the outboard cutting surfaces.
I would also put masking tape on the veneer side along with your backing block. Go slow enough so that only the center point and outside cutters exit on that side then back out.
or the flat blade wood bit that has the center v and the outboard cutting surfaces.
I would also put masking tape on the veneer side along with your backing block. Go slow enough so that only the center point and outside cutters exit on that side then back out.
Bud
1970 +2S Fed 0053N
"Winnemucca - says it all really!!"
1970 +2S Fed 0053N
"Winnemucca - says it all really!!"
- Bud English
- Coveted Fifth Gear

- Posts: 1081
- Joined: 05 Nov 2011
25 posts
• Page 1 of 2 • 1, 2
Total Online:
Users browsing this forum: No registered users and 24 guests

