Page 3 of 5

Re: Lotus restoration

PostPosted: Thu Mar 16, 2017 7:34 pm
by Chris5360
Hi Paul
Chrome got as very reasonable, considering some of the quotes just for the front bumper we over ?400 ! It was done by ray at chromeworld in Kent/Essex, to see the difference is amazing, very pleased and somebits that I thought might not be good enough have come back Beautifull, I don't rechrome the rear bumper as it looked like it already had been done, and a couple of other bits I decided to buy new, but what I did have done came to just over ?700 would have been just over ?1k if I'd sent everything but in my opinion it's money well worth spending, on my last project I thought the chrome was acceptable with small putting seeing this with its amazing shine I realise it wasn't
Your more than welcome to come down and take a look, the car is in my factory, and the interior is above my office, and all the chrome electrics, and dash etc is at home
I have a huge list of parts that I want to replace, added up roughly last night was over ?2k and i don't think the list Is complete yet !
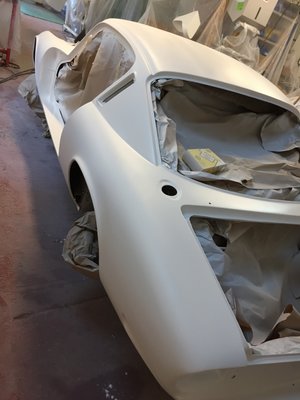
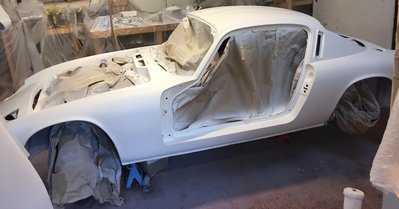
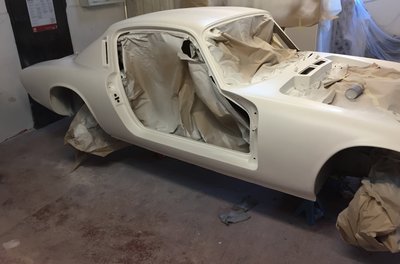
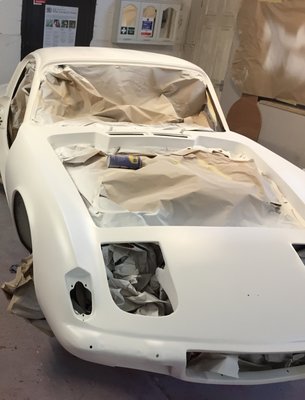
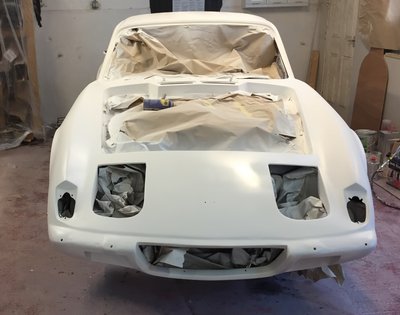
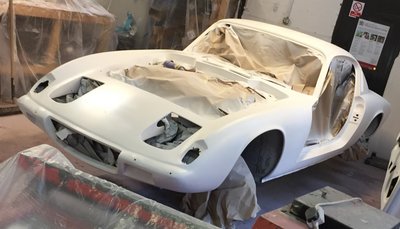
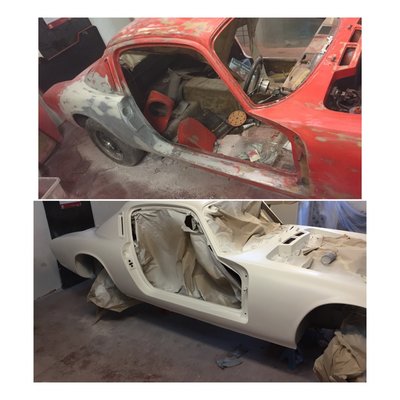
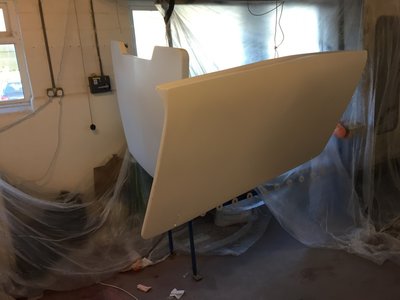
I'm quite lucky as I have my own company that employs a few people, so like today I decided to spray the primer, I got he guys to cover everything, and clean the place down ready then I kicked them outside to do what they wanted for the last hour and painted the car :) I got a guy who hurt his hand so he will prob come in and halo me sand the primer, his been bugging me to let him help
Re: Lotus restoration

PostPosted: Thu Mar 16, 2017 7:42 pm
by Chris5360
img_2123.jpg and
img_2120.jpg and
img_2118.jpg and
img_2114.jpg and
img_2116.jpg and
img_2113.jpg and
img_2117.jpg and
img_2124.jpg and

Ended up with a bit of a run on the rear passengers wing, where the first pot of paint in want mixed too well and the last bit suddenly went thin ! But it'll sand out ok at this stage

Re: Lotus restoration

PostPosted: Sun Mar 19, 2017 7:50 pm
by Chris5360
img_2452.jpg and
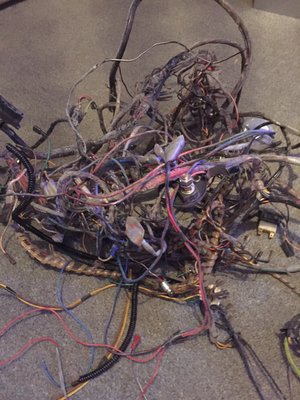
So I have my task for the evening(s). Clean this lot up and go through all connections and check for continuity through the wires

Re: Lotus restoration

PostPosted: Mon Mar 20, 2017 10:14 am
by mikealdren
Chris5360 wrote:Haven't had chance to look at it properly yet but the interior fan didn't work when I got it, but also I noticed the fins seam to be a bit battered are they easy to get hold of, or is there any mods that people do ?

Hi Chris,
just noticed this. Do you mean the heater fan? They're a Ford heater so parts are available and there are threads on restoring them.

I guess you've already unscrewed/unrivetted the heater body, you will need to (carefully) tap/pull off the cast heater levers too. If the fins are beyond repair, the heater matrix and motor should be easy to find online. The main flap has a sheet of foam sealer which will probably be dust by now. I bought a sheet of underfloor foam and fixed with spray adhesive, I probably still have some if you want to PM me, I could probably even deliver as I'm retired and have time and live near Croydon and would be interested to see your progress.

Good luck
Mike

Re: Lotus restoration

PostPosted: Mon Mar 20, 2017 10:27 am
by wotsisname
If you decide to refurbish the heater motor then there a couple of discussions on here. The main advice I wish i had read beforehand is to really clean the shaft so it's like new before removing the cover. Else the top , brass bearing can stay on the shaft instead of remaining in the cover... A bit of a pain to sort out. After bench testing i also discovered i had the fan blade back to front.. the flow is massively different. Your rebuild is looking really good... Best of luck with the spaghetti

Re: Lotus restoration

PostPosted: Thu Mar 30, 2017 7:35 pm
by Chris5360
Sorry for the late update, but I've been busy with car stuff mostly, the little bit of sun has given me a push to finish her off so I think maybe 2 weeks from now she'll be back on the road

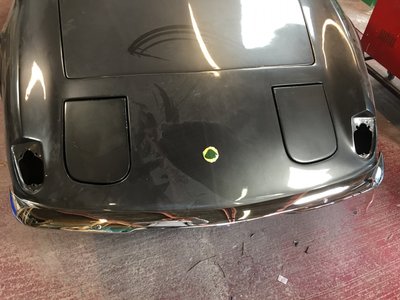
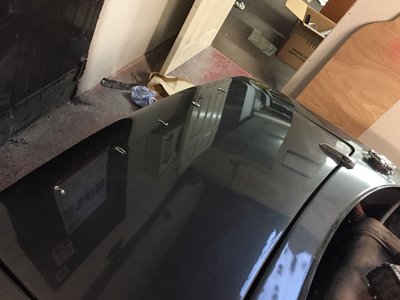
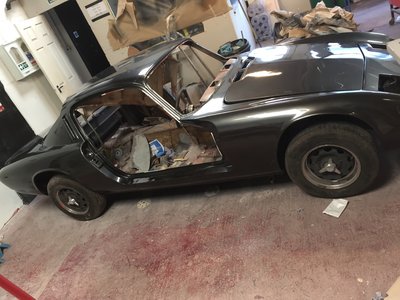
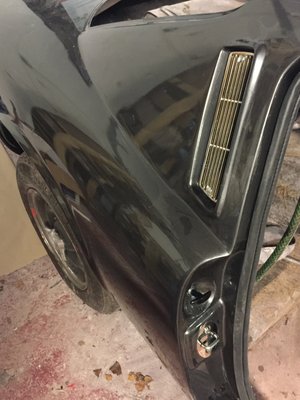
Basically she's all painted, last min desision was to go Aston Martin meteorite grey, I'm glad I did acctually and it sprayed in Pretty well for an amatuer just gotta cut the laquer back later
img_3182.jpg and

img_3175.jpg and
img_3128.jpg and

As you can see she's starting to go back together nicely
img_3174.jpg and

The colour sets the new chrome and new parts off nicely
I have one slight problem though the drivers side door latch (the bit that goes on the door) is damaged beyond repair and I can't find another one !

Re: Lotus restoration

PostPosted: Thu Mar 30, 2017 7:40 pm
by Chris5360
Oh I got a new heater motor from Paul matty ( amongst all the rest of the new bits ) wss the best soloution I thought as it's a real pig to get to if I had to get back in there later

Re: Lotus restoration

PostPosted: Fri Mar 31, 2017 7:40 am
by mikealdren
Chris5360 wrote:I have one slight problem though the drivers side door latch (the bit that goes on the door) is damaged beyond repair and I can't find another one !


Not sure what it came off but I'll bet it's a standard part off a mainstream car, my guess is BL and I would have a look at MGB sites to start with.

Mike

Re: Lotus restoration

PostPosted: Fri Mar 31, 2017 11:01 am
by Certified Lotus
Nice paint job for not having a booth. I'm impressed!

Re: Lotus restoration

PostPosted: Fri Mar 31, 2017 1:35 pm
by Chris5360
Cool I didnt think to check the list of where lotus pinched the bits from, and thank you, it wasn't too bad of a job spraying, it's the tedious prep work that's key really
Bit of dust in the laquer but I'm going to fine sand and polish it all in a couple of weeks when it's gone properly hard. That's if I haven't got it back together and am enjoying driving It too much !

Re: Lotus restoration

PostPosted: Thu Apr 06, 2017 3:29 pm
by stugilmour
Love the grey colour.

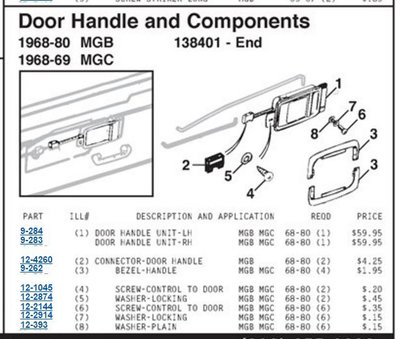
Looking around it looks like the latches may be common across several BL products including Austin 1100 and MGB. Not definitive, but the RHS may be available but not the LHS? This guy might be a place to start, or I think I saw a call-up in Moss motors. No guarantee these are the exact match, but might be a start....

http://www.somerfordmini.co.uk/eshop/in ... X67A7yt9G2

This thread shows the comparable MGB exploded drawing. I am only going from memory, but looks close...

http://www.mg-cars.net/mgb-technical-bb ... 721826.htm

Similar in Victoria British catalog...

http://www.victoriabritish.com/icatalog ... px?Page=20

See the excellent recent thread on adjusting and tightening the Plus 2 latch rods.

PS - Let us know if you find a cross-over that works.

HTH

Stu

Re: Lotus restoration

PostPosted: Thu Apr 06, 2017 5:15 pm
by pharriso
Love the color!

I believe the door latches are the same as late Elan & also came from Mini MK3. Looks like Victoria British also carry the infamous white clips separately:

victoriabritish_doorlock_parts.jpg and

Re: Lotus restoration

PostPosted: Thu Apr 06, 2017 8:58 pm
by Chris5360
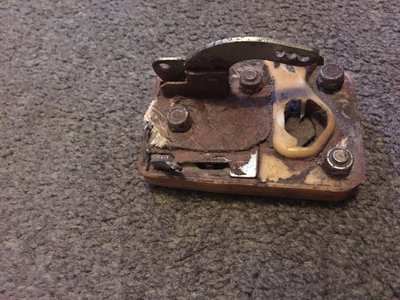
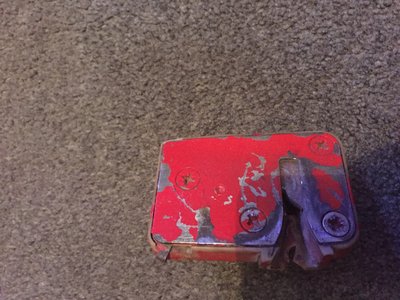
img_3269.jpg and
Some very similar looking locks there thank you
Mine look like this but one of the levers on the left has broken off
img_3270.jpg and

Re: Lotus restoration

PostPosted: Fri Apr 07, 2017 4:48 am
by Sea Ranch
Hmm . . . narly looking latches. I see the door jam striker (U bolt thing) has actually worn through part of the plastic body of the catch. I believe those need replacing :shock: :(

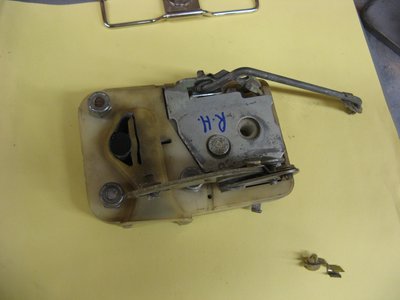
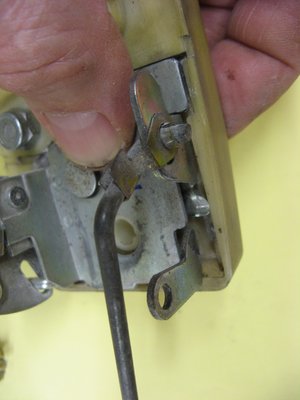
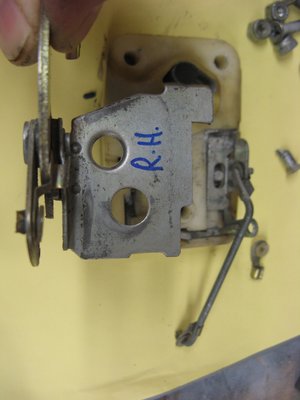
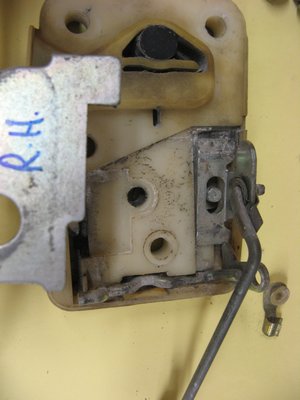
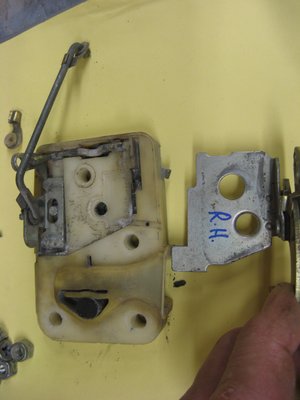
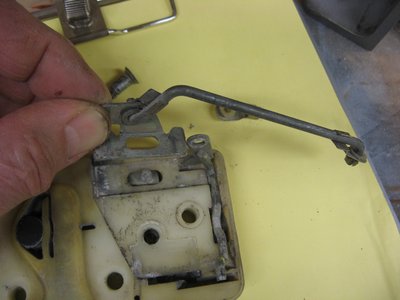
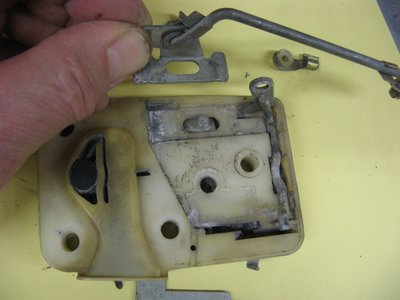
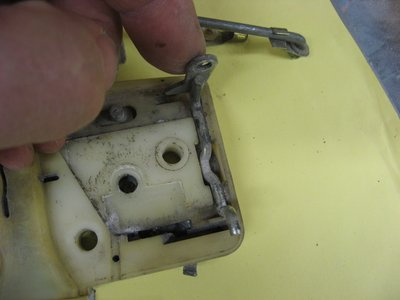
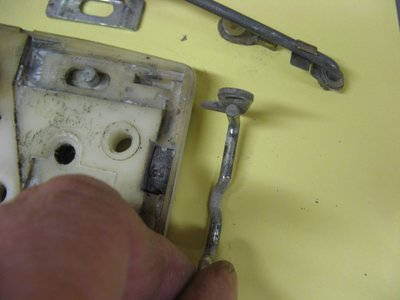
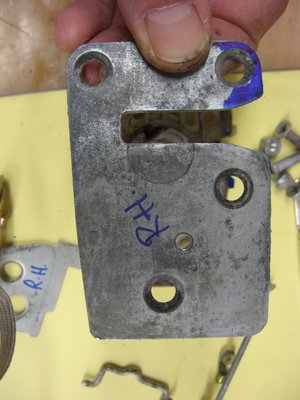
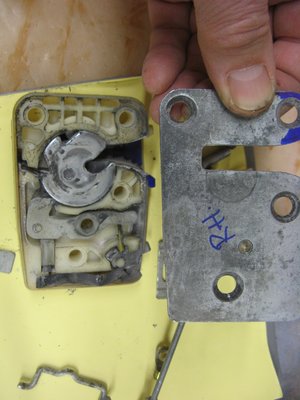
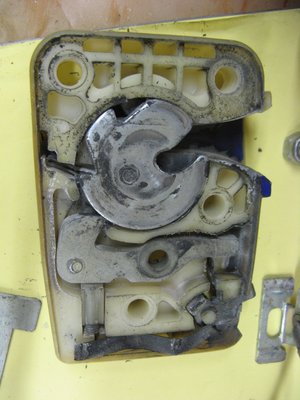
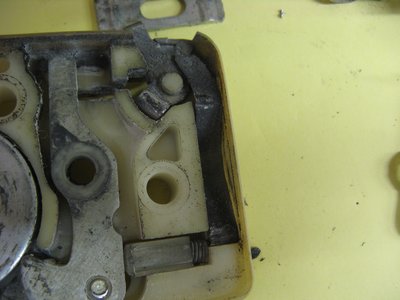
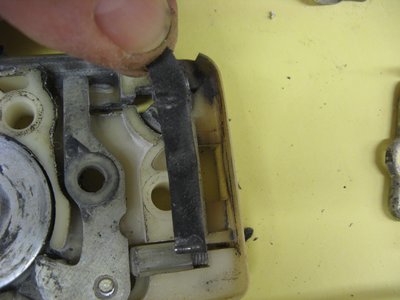
Seem identical to mine (Plus 2S). I drilled out the single rivet that holds them together and then, with camera in hand, carefully disassembled/photographed/disassembled/photographed . . . :mrgreen:

Cleaned them up thoroughly and as they weren't worn, I had the main plate and some other pieces replated and then reassembled with grease. I reused the drilled out rivet, but of course it wasn't holding the assembly together. The bolts which fasten the catch to the door hold the assembly together. You must re-use the rivet regardless, as it forms a pivot/locating part for internals.

img_4215.jpg and


img_4216.jpg and


img_4217.jpg and


img_4218.jpg and


img_4219.jpg and


img_4220.jpg and


img_4221.jpg and


img_4222.jpg and


img_4223.jpg and


img_4224.jpg and

Re: Lotus restoration

PostPosted: Fri Apr 07, 2017 4:52 am
by Sea Ranch
Just to finish off . . . :wink:

img_4225.jpg and


img_4226.jpg and


img_4227.jpg and


img_4228.jpg and


The blue felt pen marks in the some of the pix was from bodywork stage and making adjustments to make sure the latches and strikers would not rub on each other when door was fully aligned, etc. Had to "move" the latch mounting surface on the door "in" by building up fiberglass on the inside of the door and grinding off on the outside :oops: :shock:

Regards,

Randy